Not fair!

Barely ten months ago I was cruising 20+ mile days through the Klamath Mountains, Sierras, and Cascades. Ten miles of hiking after an early dinner was no big deal. I was often surprised at how light my pack felt. 

This trip I have not cruised any day, however short. And not once have I been surprised at how light the pack is–in fact I eye it with some suspicion. What the heck happened?

Day 1: Depart Devil’s Postpile area 4pm for a lake six miles distant, a mere 1500 feet higher. “Casual” is the word I used with the ranger at the wilderness permit desk. Poor choice.

Three miles in my legs were so wobbly it felt like the trail was swaying; not firm earth but a rock-and-flower-littered tightrope. The honey colored air was thick with late sun and pulsing with insects and with my own heartbeat, a phenomenon I believe my eye doc calls a “visual migraine”. As my head got lighter (alas, not the pack…) the entire scene was dissolving into a vivid amber solution. By the way, no ‘shrooms were involved;-).

Interrupt: a hummingbird is working the flowers on the patio where I sit outside the invaluable Looney Bean Cafe and Therapy Center, but after each short sip it lands and rests, sometimes barely reaching a perch before the wings quit, panting w/beak held high. A rough day?

Back on trail: I swam on, inwardly repeating “strength in weakness”. Around 8 the sun dropped out of sight, the colors drained away, and by 8:30 I made camp a whopping 5 miles from the trailhead. 

Casual…right. 

Mid Willamette Woodworkers Annual Guild Show

Wet glue. Tender finishes. Double stick tape. “Don’t pull on this part” signs. Rebellious plywood.

What a show. I blame it on this:

the “one week” dining table, here a 5″ tall model. I like the role that dining tables can play in our lives and have wanted to design one to reach more people; i.e. have a relatively modest price. A fine table–without compromise on quality or materials–in a week’s work sounded tidy, especially if enjoyable enough in process and result to repeat from time to time. One evening some weeks back this model popped out.  
Now the deadline for submittals to the Guild show had arrived w/only two pieces on track to be ready: the desk (various earlier posts, a long and involved project), and a reproduction Shaker side table, revived from a traumatic misstep that had sidelined it a couple years before. Still a bit weak, I felt. There were nine days until the show, why not make the one week table? The little model sitting on my desk was still appealing after seeing it every day for over a month, so I emailed the submission, pulled some beautiful 5/4 boards for the top, and got to it. 
That evening Ann gave me a “what were you thinking?” look. Whatever–I didn’t see her (or anything else) much for the next nine evenings. The table required about 60 hours; what with dimensions to firm up, curves to sweeten, templates to make, knock-down hardware to fabricate, a new tool to sort out, and unusual stress and micro-checking in the planks, all on top of the actually making the thing. 
Oh yeah, and finishing the other two projects. Turns out there was a fair bit still to do on the desk, and the Shaker piece wasn’t even half made. Thank God for double stick tape. 
But the results weren’t too bad: 

A lovely three-board top on a trim yet strong base that knocks down in a minute for transport. I’d be happy eating at this table. Next time it’ll take a week.  
The desk looked good under the bright lights too, as did the Shaker table just to the left by the love seat: 

All of the keyboard tray internals were held together by tape or unglued loose tenons. The Shaker table actually showed up the second day of the show, having been glued in the morning, finished after lunch, and delivered around four. Some cute person had already voted it best in show; what faith!

Day Six plus a little

It was a really long day. 
Daylight Saving Time became official just as I hit the sack; 2am became 3am on my cheapy clock radio that magically updates itself. 

But lots happened.
I’ve never installed glass. It was nerve-wracking as I imagined the glass ready to break at any moment.
Not the worst cabinet ever made in a week. 
The funny lines on the glass are the pattern of “German New Antique”. 

The pull is a temporary applied with the indispensable double-stick tape. 

Yawn. 

Days Four and Five

Day four suffered a picture shortage, but as planned I fit the back panel and door to the case. About 10:30pm the day ended with cutting the hinge mortises in the top and bottom of the cabinet. the router seemd scary so I used chisels and router plane, the funny looking item in the photo. 

Day five was a drive toward glue-up of the carcase; detailing, prefinishing, cutting holes for shelf pins. There were a couple significant design-as-you-go decisions, both involving the top. Mid-afternoon I added a horizontal detail line around the underside of the top, shown here:

Then at 10pm during a dry run of the glue-up it became apparent that the top needed a curving top surface, so I took the completely finished piece to the bandsaw and whacked away the offending material, cleaning it up with a handplane:

A small thing with a big effect on the piece. I’ll have to refinish the top after glue up.

Then it was on to glue-up, in which I nearly destroyed the entire week of work; in spite of having done a dry run, during the real thing I glued the left side in upside down and backwards. I was breathing a sigh of relief and admiring the glued and clamped cabinet when I decided to lay the door in just to double check squareness. The door didn’t fit, not even close…because the rabbet for the back–which was facing forward in the backwards piece–is an entirely different shape.

Deciding a fight was better than setting fire to the shop, I hastily took the clamps off, disassembled two and put them back together as spreaders, and pried the case apart. It was reluctant, but finally popped. I flipped the inverted side but noticed some dowels would have to be removed and replaced in different spots. They were really stuck; as I pulled and torqued with pliers the dowel twisted like a corkscrew.

Ultimately they came out, went where they belonged and my daughter Meghan walked in to witness a victorious reassembly, which I will accept as evidence of a merciful God.

Tomorrow: hang the door.

Wall cabinet day 3

Started the day with case joinery. So far so good. 

Then doweling dyslexia hit – ouch!

Not what we need just now.

The backup piece wasn’t nearly as nice, and after a few minutes a repair came to mind: slice off the front, slide it so the offending hole is out of the way, plane the edges for a killer fit and reglue. Here it is in clamps, with the offending hole magically moved.

While that dried I planed the curve into the sides after sawing away the bulk. Side light makes the shape easier to see.

Day ended with the first meeting of door and case.

Tonight the back panel is in the vacuum press. Tomorrow the door and back need to be fitted.

Wall cabinet in a week

Mostly.

I did a prototype and rough milled the wood earlier, but by the time the wood had chilled there was a week. Here’s a veneer being cut for the back panel.

And here is the wood resting up and de-stressing. It would have been nice to let it rest for a few more weeks…oh well.

Off to the races: Day 1

We have a whole week, let’s do a curved door. Careful layout will pay off later.

End of day 1 – joints that fit juuuust right. Shaping tomorrow.

Day 2
Now we have some shape, and a chamfer w/a little movement. 
Shortening the tenon just a little makes the clamping easier. Fast, controlled, and clean with a plane and shooting board. Every home needs one. 
8:15pm: glue-up complete, motivational music by Sam Bush. 
Boy do bridle joints require a lot of clamps! And so fussy to make perfect; there are many visible joint lines on a bridle and they all have to be spot on. 
Used Old Brown Glue, a hide glue formulated by W. Patrick Edwards–strong, repairable, and does not impede finishes like a PVA glue…and there won’t be time to deal with finishing problems. 

Veneer, no apologies

Solid wood = top quality. NOT! Well, not necessarily, anyhow. It depends on the design, the veneer, and the workmanship. It’s true that there is a lot of lousy veneered furniture, cellophane thin veneers used in places likely to receive wear or damage, cores of particle board or other materials assembled in ways that nearly guarantee early failure.

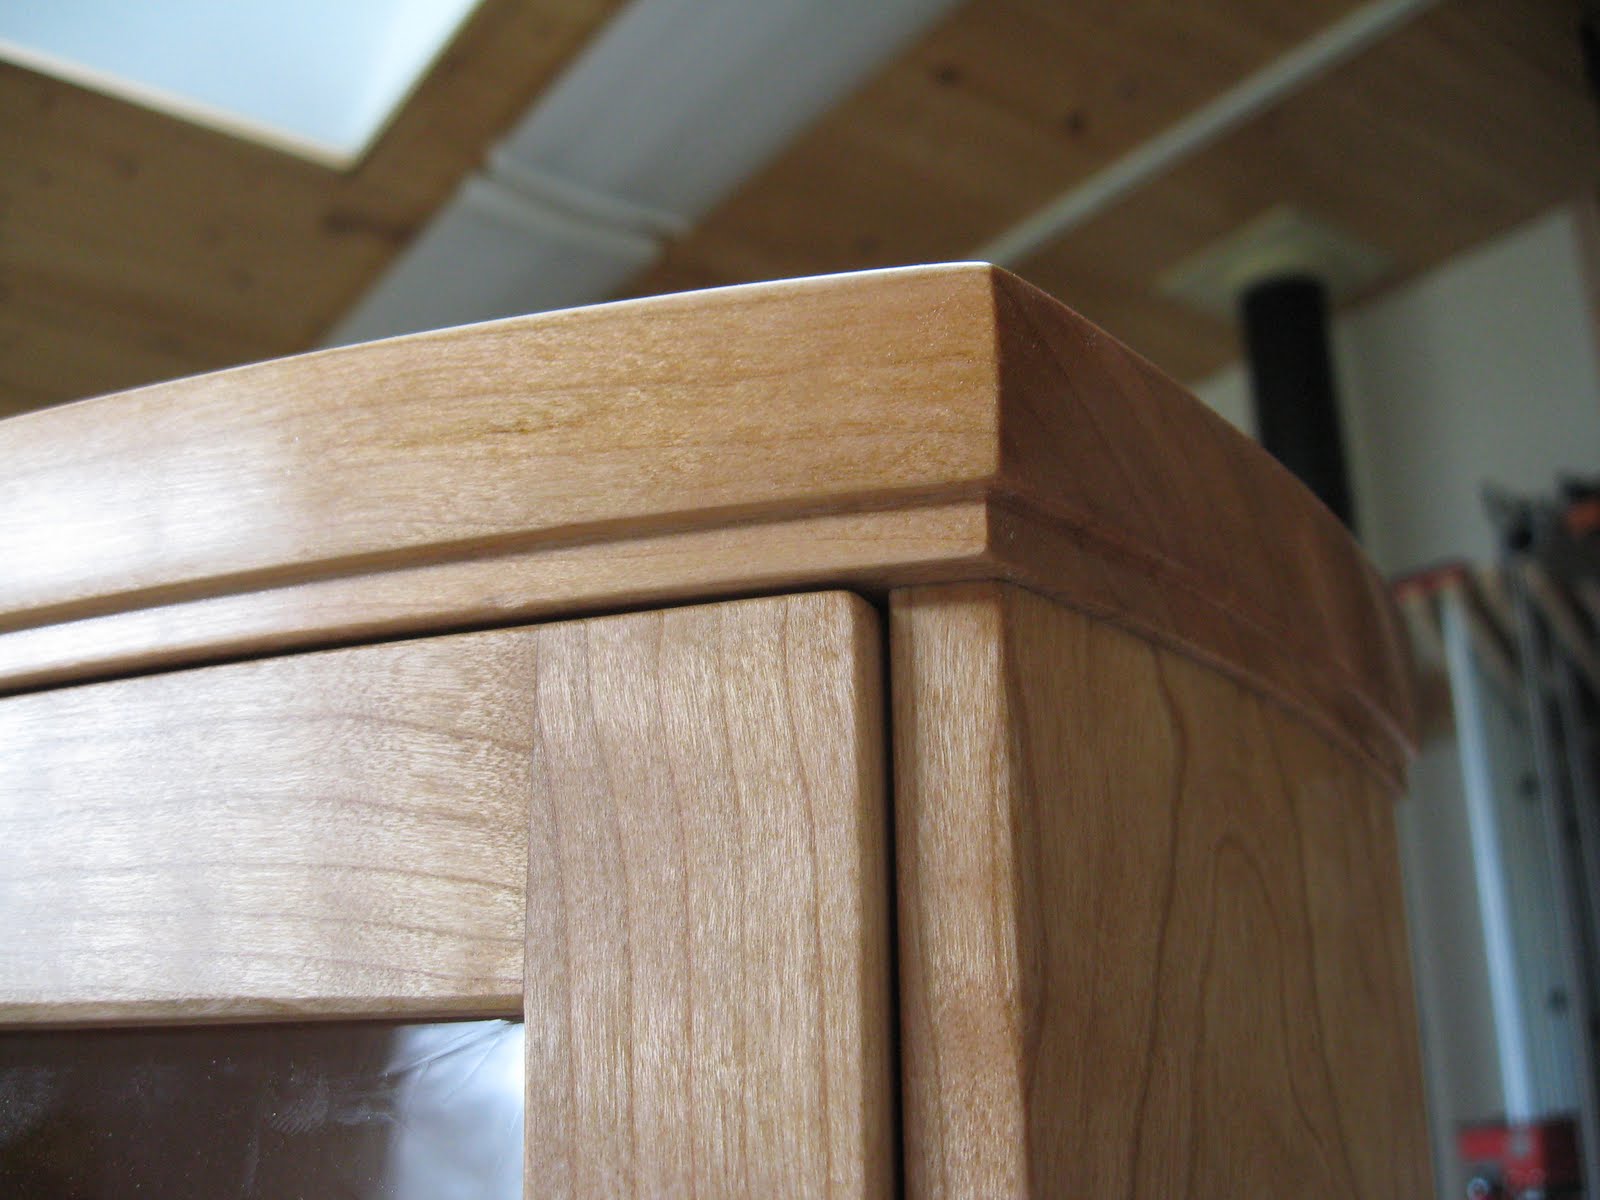
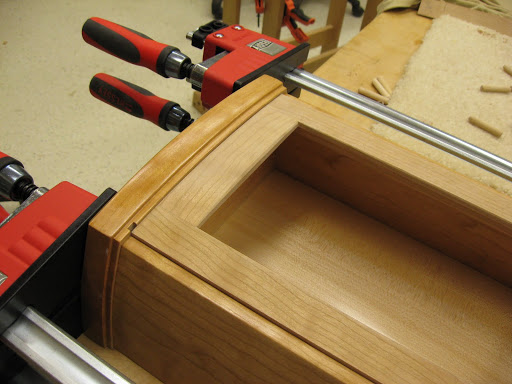
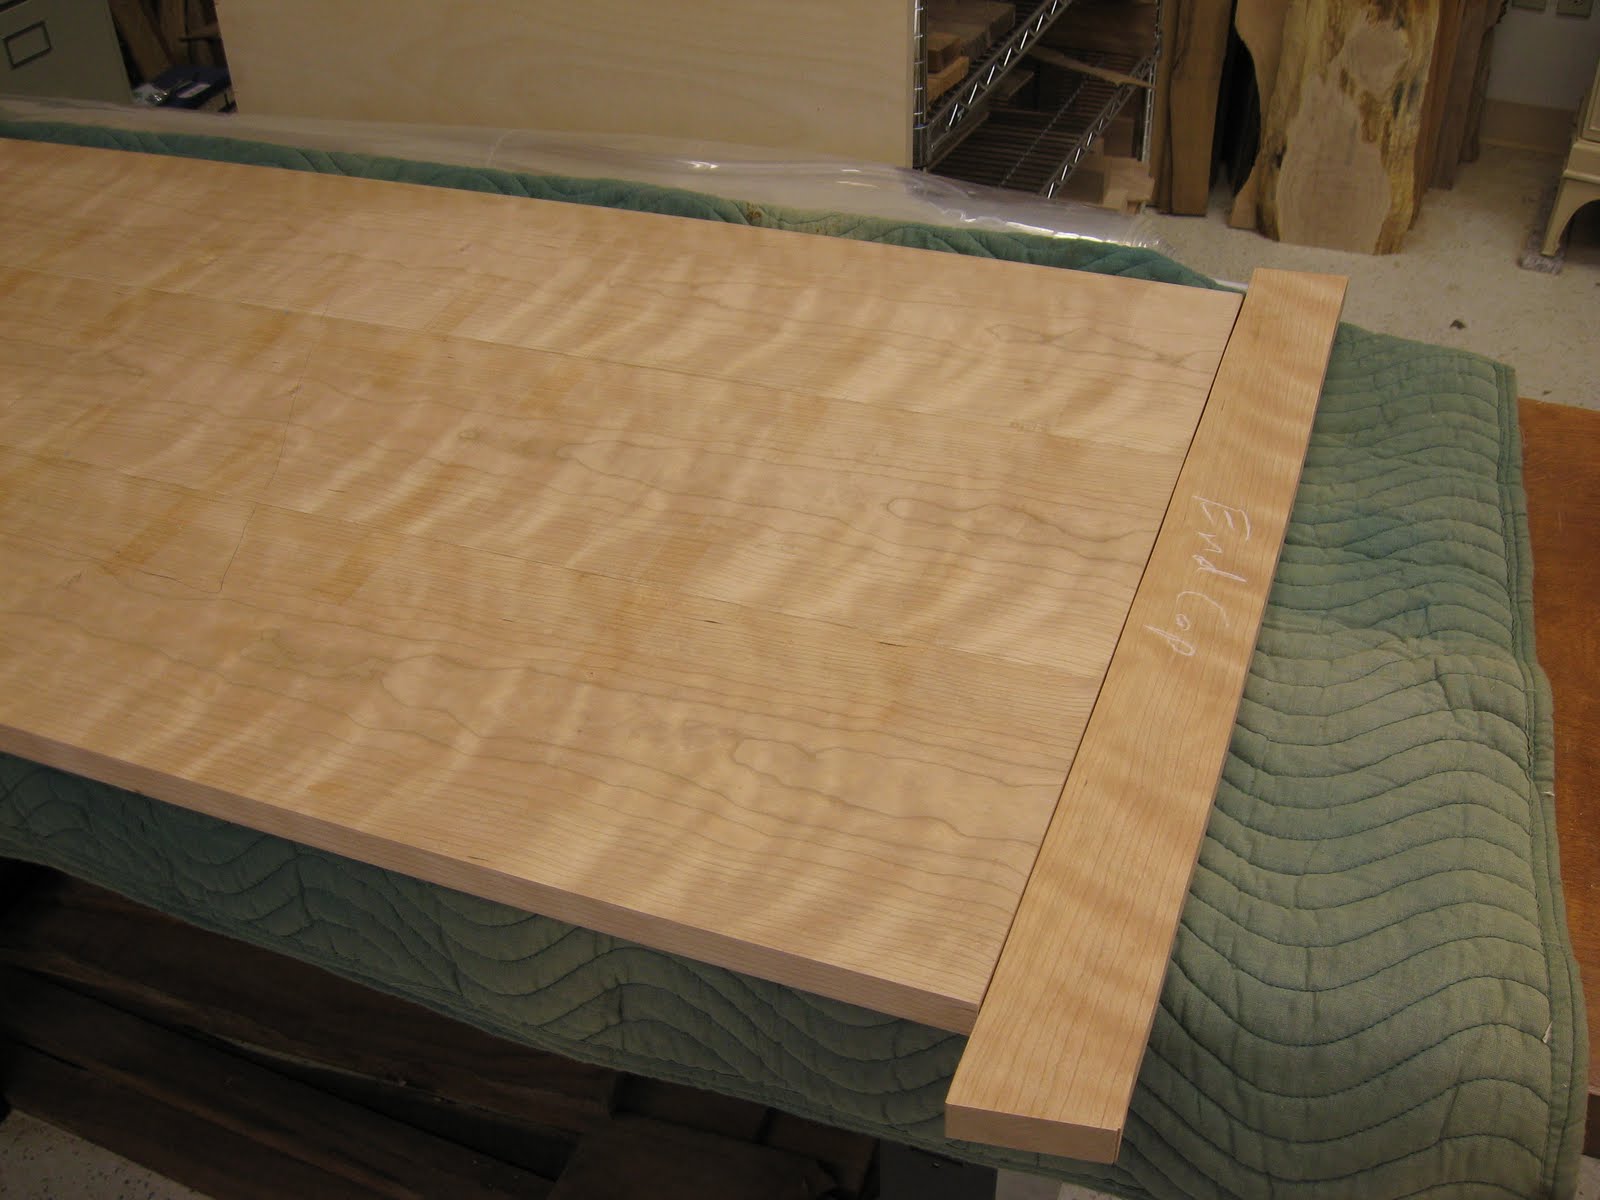
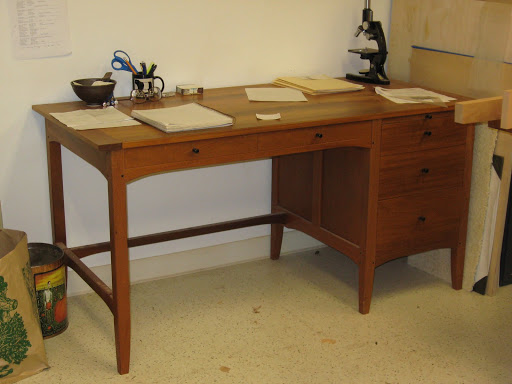
However, some of the finest furniture ever made was veneered, so it’s possible. This desktop will be veneered AND it will be bomber! Here’s a preview (from a later step fitting the end caps):

Makes me want to keep this desk too.

It starts with veneers that are much thicker than usual – between 1/16″ and 3/32″. At this dimension the veneers are stout enough to repel significant abuse but–and this is critical–thin enough to NOT act like solid wood once it’s glued to the core. Thicker wood moves powerfully as it absorbs and loses moisture–which it does continually in response to humidity changes, even when finished–but centuries of experience has shown that veneers of this thickness can behave very well.

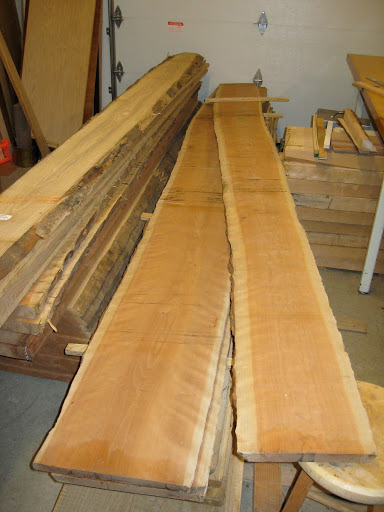
For most of furniture history “thick veneers” were the sole choice, as tools to economically produce thin veneer didn’t exist. Veneer use was limited to the finest furniture because it was so laborious. These very thin “boards” were painstakingly hand-sawed out of the log, often by two man teams with one poor fellow down in a pit getting a sawdust shower. Thank God for big bandsaws today! I sawed the veneers a bit thick at ~1/8″, knowing that the dull-ish bandsaw blade would cut unevenly and need a fair bit of clean up later, which would take the thickness down to target.

Next we want a quality core: flat, stable, able to hold fasteners strongly. This desk uses 3/4″ Baltic birch, a super high-grade plywood that is tougher than many solid timbers. Before veneering I glued bands on all 4 edges, using cherry from the same plank as the veneers for the edges that would eventually show, and a less precious wood on the ends where it will be covered by the “bread-board” end caps.

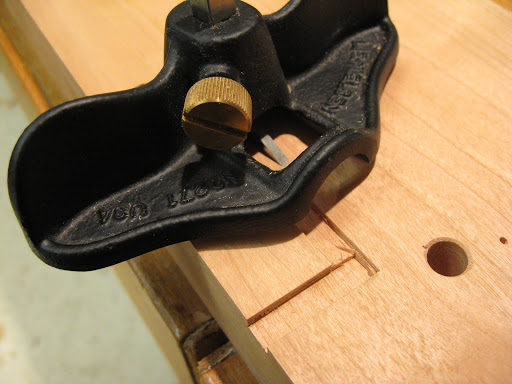
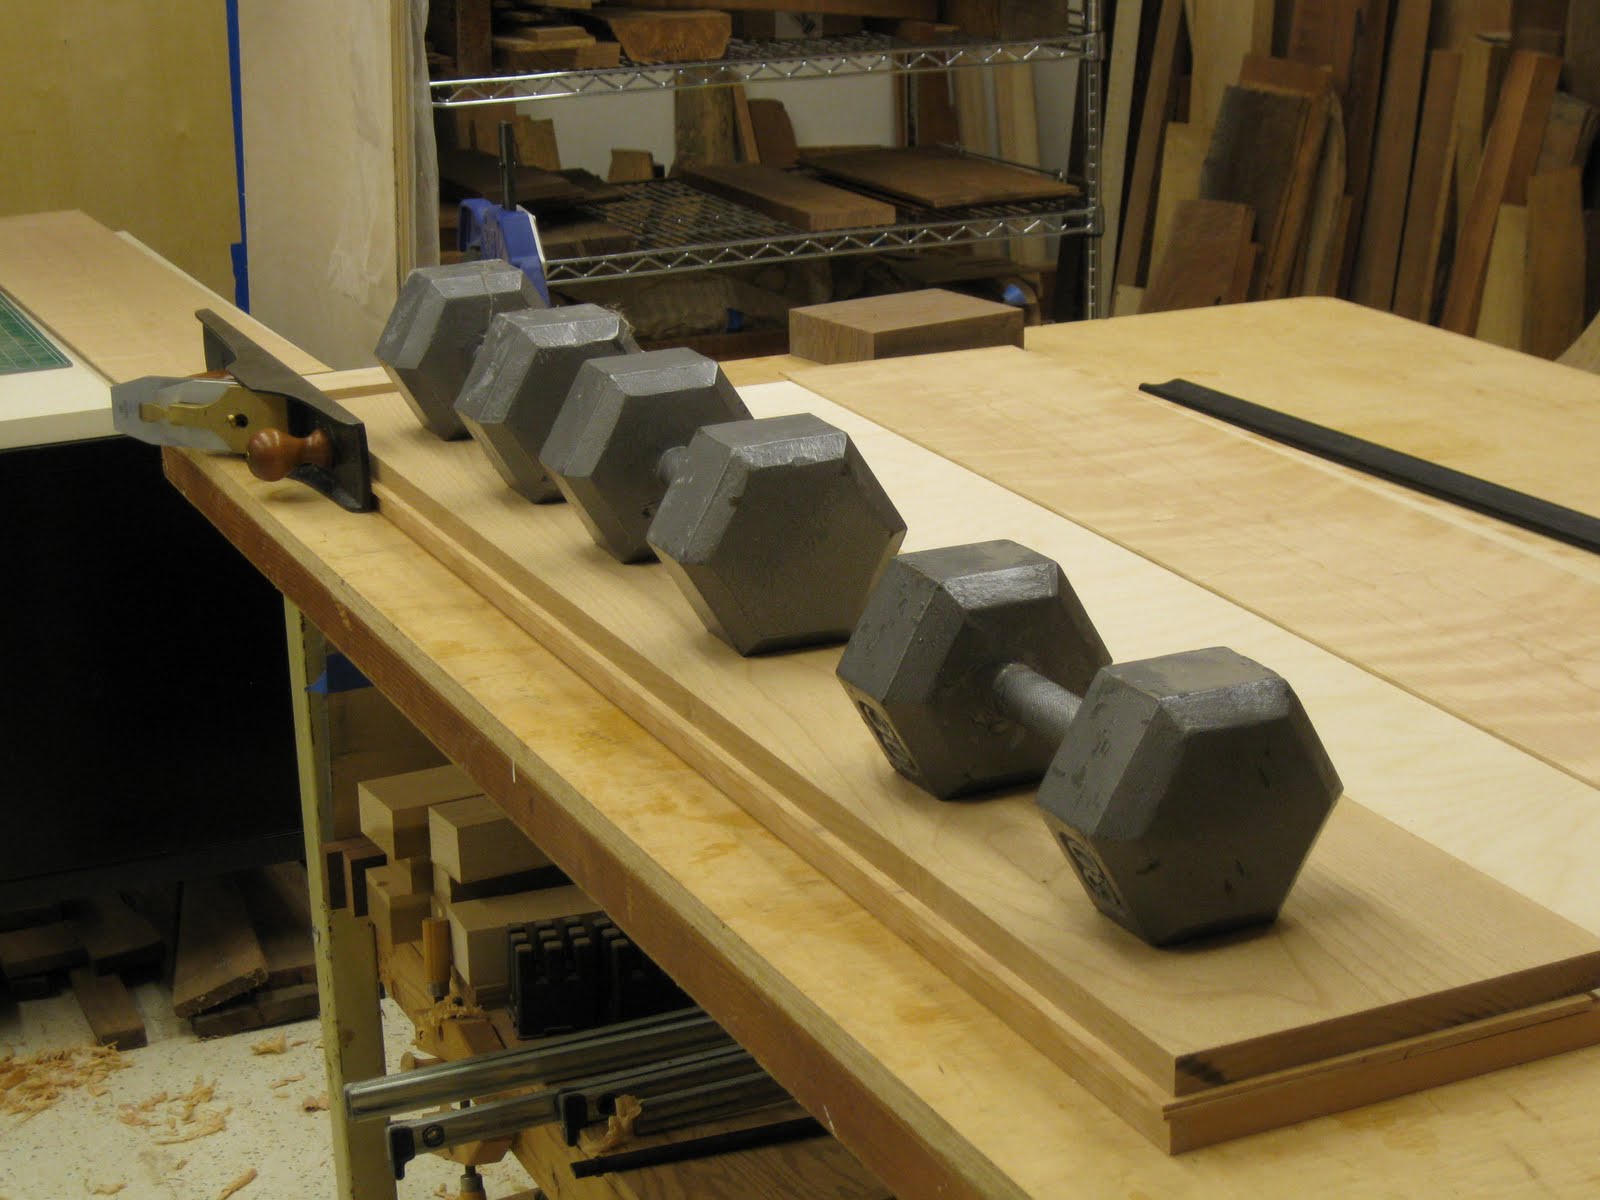
After attaching the bands I carefully handplaned them flush with the plywood. Mmm, look at that cherry.

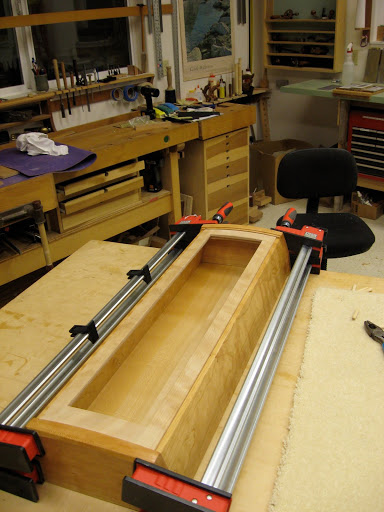
Here is the edgebanded top ready for trimming:

(The following day while setting up to trim on the table saw I managed to drop this assembly and a huge crosscut sled on myself while crawling underneath to adjust something–OUCH! Had to repair some dings too).

When the veneers go on they further lock in the edge bands, and the matching wood will look very clean and natural. Before going on, though, the bandsaw marks on the glue side of the veneer have to be smoothed. Most shops use a sander, but lacking that a handplane did the job:

Then plane perfect edges on the veneers in preparation to edge glue them to each other:

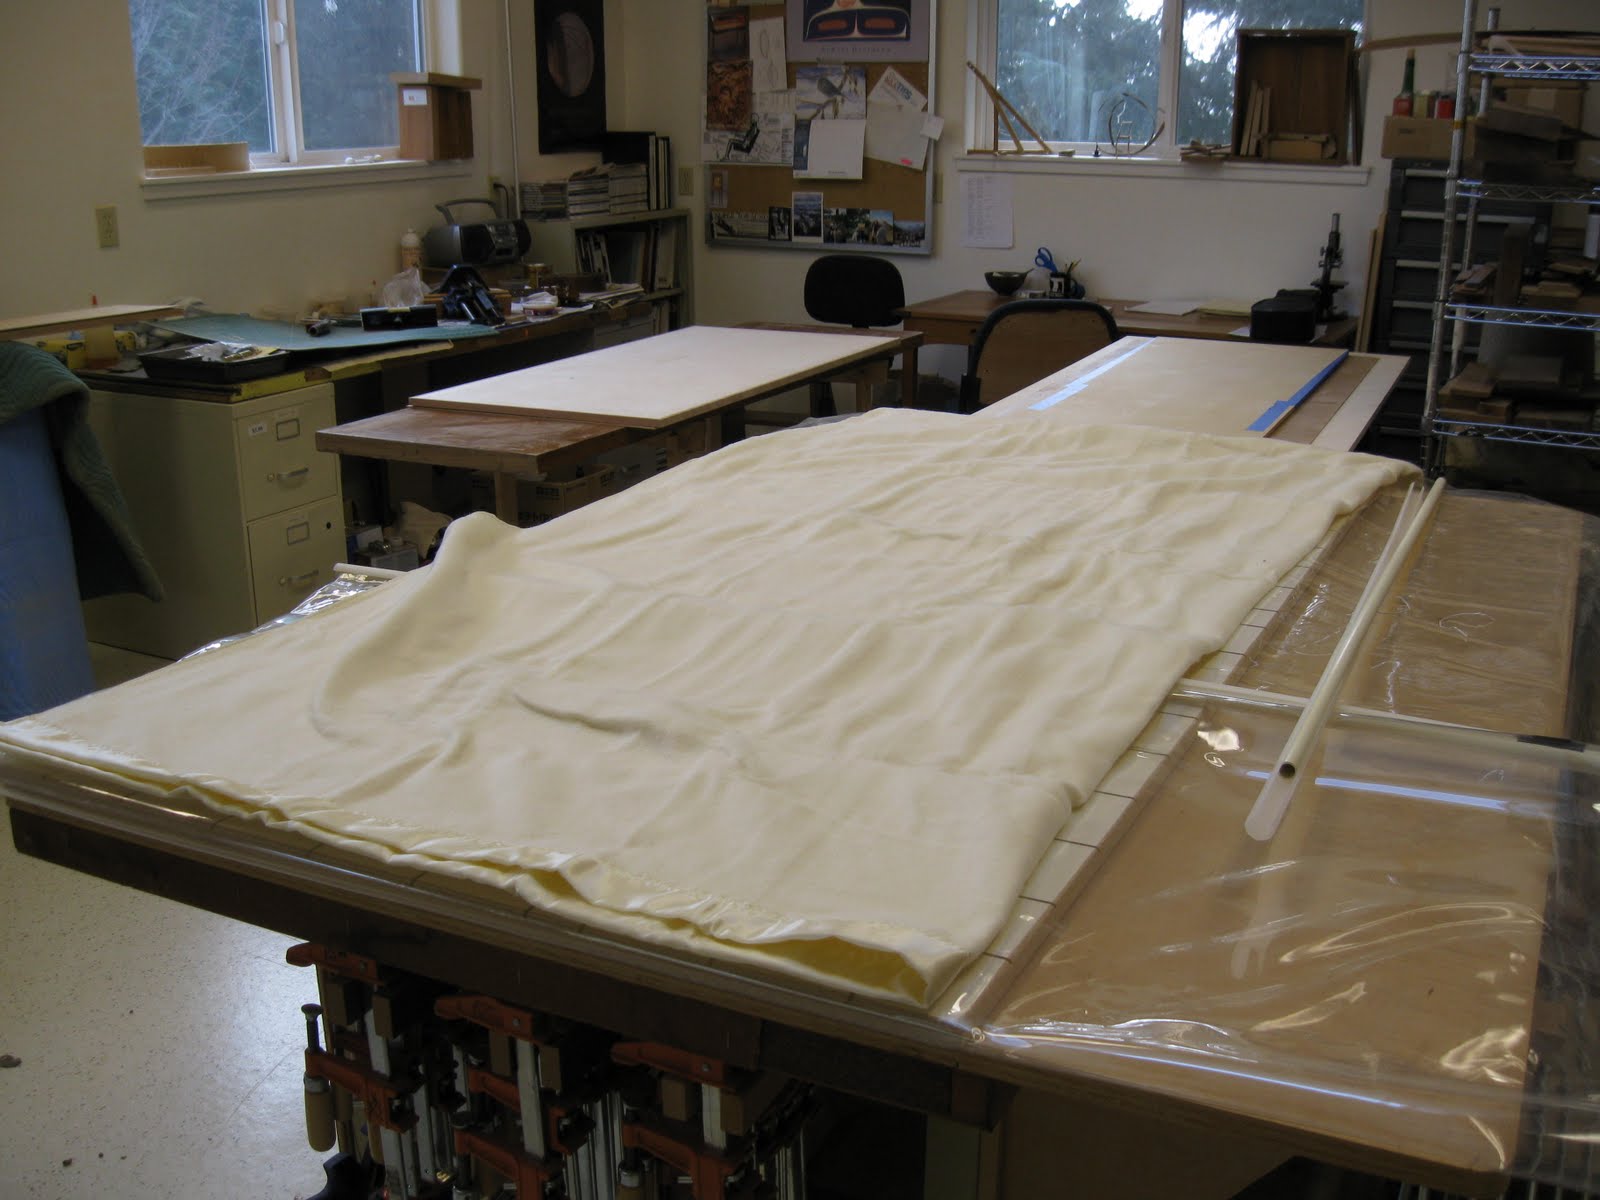
Changes in the weather affected humidity in the shop and the veneers didn’t want to lay flat, but some weights pressed them into line. Planing with the plane riding on its side like this is called “shooting” an edge joint.

The veneers were then glued edge to edge (“clamped” with tightly stretched blue tape) to create a single thin sheet the size of the desk top. I had also prepared a set of veneers for the underside of the top, needed to balance the assembly to prevent warping. Since not everyone edge-glues veneers before pressing I decided to skip that step on the bottom veneers as an experiment, instead just taping them together with special veneer tape.

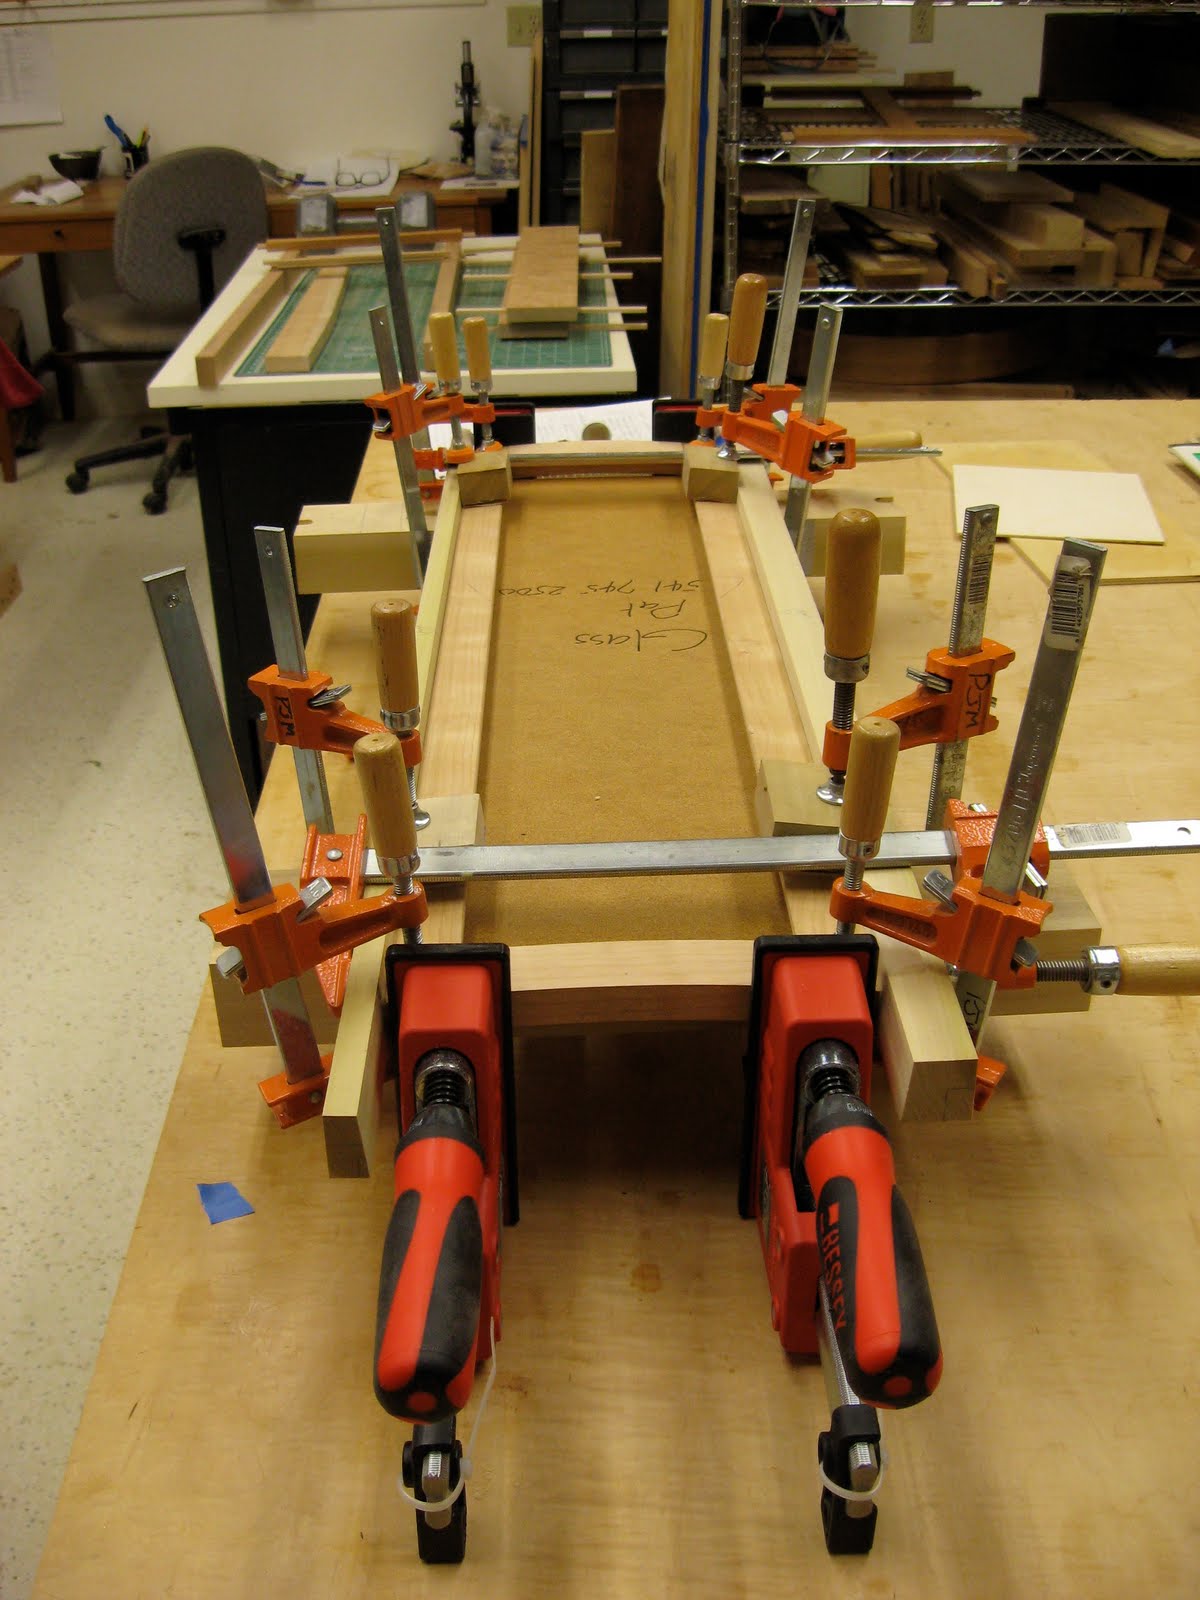
Finally it was time to press the whole assembly together with the vacuum press, essentially a super big ziplock attached to a vacuum pump; slip the glued up assembly in, seal the bag, turn on the pump, and marvel at how much force air can apply. The shop was a bit cold, so I put an electric blanket on top:

This was the dry run, so the bag closure rod is sitting on the right no yet in use. You can just see the grooved melamine sheet under the blanket edge, acting as a platen for the assembly, the grooves providing channels for the air to escape as the vacuum pump operates.

Having done a dry run I expected things to go smoothly, but the above mentioned experiment (not edge gluing the backer veneers) nearly resulted in catastrophe. Upon contact with glue the 4 backer pieces curled like potato chips and broke the veneer tape. In a panic I rejoined them with stronger blue tape, slapped the cherry veneer on the other side, taped the whole mess to maintain some alignment and zipped it into the bag as the backers tried to break loose again. The vacuum tamed it, but that was a close call. Had they curled just a bit more I would have had to scrape off the drying glue…it could easily have been a total loss. Good thing I didn’t use a water based glue, which would normally be appropriate for a flat assembly but which would have caused even more violent warping than the Unibond 800.

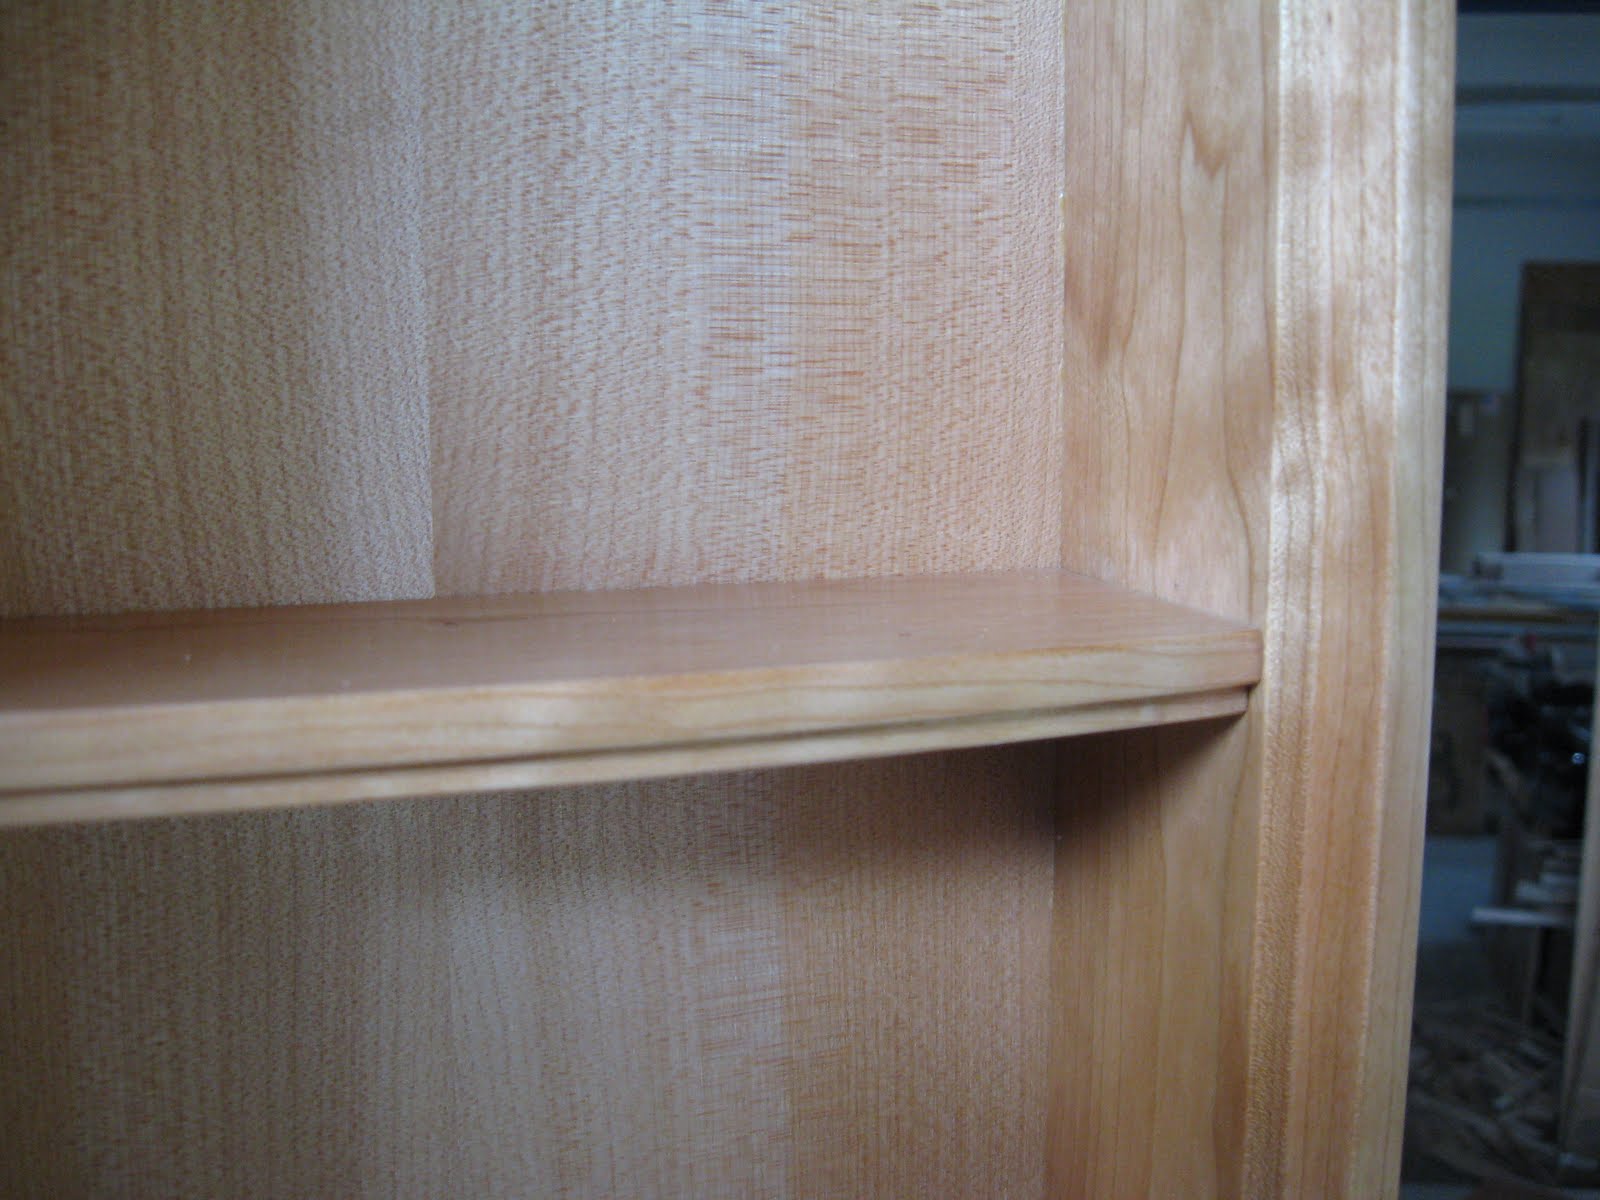
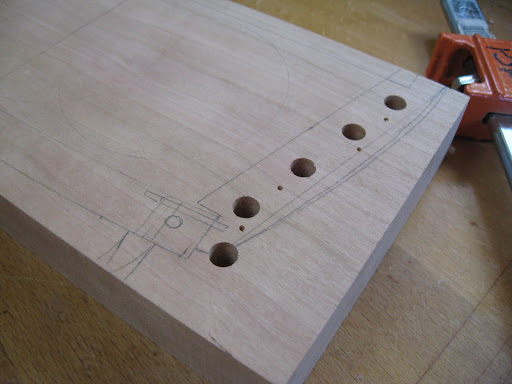
Approximately 24 hours later you’d never guess the harrowing struggle; the veneered assembly came out of the bag flat as can be and has stayed that way ever since. This morning I detailed the front and back edges with shapes that attractive and comfortable to the touch, a task easier to do before the breadboard ends go on. The thick veneer shows another great virtue here–it’s thick enough to allow shaping, whereas thin veneers lead to hard angular edges that are easily damaged.

This is a veneered piece that makes no excuses.

Desk job

I spent a lot of years behind a desk. This time it’s different…not just behind, but in front, on all sides and angles, underneath, on top, inside out. After posting nothing but hiking pictures for months it’s time to catch up with the shop, and the latest project is a desk for a good friend.

It started out in oak to match the other woods in the room, mostly plywood, two pedestals, eminently usable for the writing, photography work, and deep ruminations that go on at the tiny desk currently in place, but when Warren and Peggy came to pick oak boards from my stash a chance encounter with a cherry dresser triggered an avalanche of change.

It didn’t hurt that I had planks like this hanging around the shop:


This plank is from an amazing tree that Dan at Horizon Woods told me about. It had two stems, each with nearly 40′ of clear straight wood as much as 27″ in diameter. Six logs of matching wood so nice you could have it for dessert–look at that color with no finish, steaming, or anything!

And this one, the instant choice for the desk top:

Cherry seemed to call for a more refined design–like this one, which just happened to be in the shop:

I designed this desk years ago before I had the skills to build it, and John Fisher (another College of the Redwoods grad) did a fine job making it. I am very excited to build it this time! The original drawings were not to be found, so the first order of work was to carefully measure and redraw the whole thing. Seemed slightly recursive to draw plans on the desk that is the subject of the plans.

Once the revised plans were approved it was time to make big pieces of wood into smaller ones. One big reason I like to order wood by the log comes into play now – I can select wood from different portions of the tree to control the grain orientation for the different parts. This first section of plank had nice legs at the outer edges where the rings run about 45 degrees to the faces, and drawer faces or panels from the center of the plank, a nice use for the more swirly flat grain found there.

I always feel butterflies cutting up nice wood–will the choices work well, will the wood move like crazy, will there be hidden defects? Here we go working out those commitment issues on the bandsaw:

Another round of sawing yielded a collection of roughly 1/8″ thick veneers for the desk top. It was a major workout, as my big resaw blade was getting dull. Thankfully the heavy work had a nice payback:

November?! No Way!

But the calendar insists…sigh.

September and the Sierra already seem distant, especially since the infamous Oregon rains started in earnest. Worse yet I’ve gained some weight back already–the horror! For years I have planned to make my fortune by writing “The John Muir Trail Diet”, an honest method to lose weight, increase muscular and cardio fitness, and increase appreciation for both the natural and built worlds. Two hundred plus miles of backpacking in mountainous terrain each year for a svelte, strong, flourishing you. Gaining part of the weight back after only a couple months is NOT SUPPOSED TO HAPPEN. Ten years ago it didn’t happen, so presumably it’s a fluke, an aberration in the data and the fit of my clothes. Harumph.

Maybe it’s because I did not walk a thousand miles. In fact the walk covered just 425 miles; not an inconsiderable distance, but far short of my plan (such as it was) and hardly a warm up for a serious thru-hiker (e.g. one who walks the entire Pacific Crest Trail in one year).

For 300 miles or so I walked like a typical thru-hiker, rising early and walking long to cover twenty or more miles. I mentally catalogued beautiful places and intriguing side trips for future visits but walked on, dallying only occasionally to watch wildlife or take pictures.

The miles flew underfoot at twice the daily rate of any prior walk. One evening a month along, snug in camp as the sky blazed after a storm, I looked north to pick out where my previous camp had been.

It was way the heck out there; so many ridges, summits, and valleys in between. And the camp environs from two nights before–nearly 50 miles distant–was indistinguishable. Amazing.

Two days later in town to resupply, however, I couldn’t keep images from the previous stretch straight; campsites, springs, mountains, wildlife, rain storms, they slid about and formed multiverse histories that didn’t align with the order of images in my camera. Was Ebbett’s pass the one with the great people and the fruit bowl for thru-hikers, or was that Carson? The coyote was the day after the cinnamon bear…wasn’t it? I was “homesick” for places from just 48 hours earlier. My experience of any given place along the trail was so brief that calling it a visit seemed like overstatement–it felt more like a filmstrip.

Thankfully the next few weeks featured visits and day-hikes with family, a perfect pretext for a wholesale abandonment of discipline: if a spot looked nice, we’d plop down; if a side trail looked tempting, we’d take it; if there were rocks by the creek, we’d toss some in; if there was ice cream at the Tuolumne store–and when isn’t there?–why sure!

Trail mileage plummeted but my enjoyment and sense of connection to these amazing places soared. And that, as they say, made all the difference. There was camping and supreme lake splashing w/niece Jen and Nicole and their irresistible daughter Sophie, a week of hiking, weasel chasing, and eating at the Whoa Nellie Deli with my wife Ann and daughter Meghan, and a choice tour of Mammoth trails and coffee shops with brother Blair.

For nearly a month I explored an area that would have taken a week at the earlier pace, from the Burger Barn in Bridgeport south to the Looney Bean in Mammoth Lakes, and from wonder-of-the-world contender Tenaya Lake east to the fabulous Whoa Nellie Deli (where people often marvel that one of the best meals they had ever eaten was at a Chevron station in the middle of nowhere. I took everyone who visited, and if you ever visit me in the Eastern Sierra I’ll drag you too).

I returned home to visit in early September and never made it back to the Sierra. There were reasons, but they’re not important now. Next time the hike goes deeper into September, and maybe the weight will stay off and I can write that book. Or maybe it’ll have to be Cool Local Eateries of the Eastern Sierra–looks like more research…

Ha!

Had trouble uploading photos after computer changes, but finally figured it out. Lots of catching up to do, but at least I can begin. For the moment here are two images from the northern Sierra:

Distant thunderheads over the Carson range just south and east of Lake Tahoe


Round Top, looking south over Carson Pass


Midsummer in the Sierra…ahhh.